How to hide pictures from the Photos app in Windows 11 and 10
If you use the Photos app to view pictures stored on your Windows 11 or Windows 10 computer, you probably have noticed that normally it displays all pictures it can find on the PC. What if you don't want some of the pictures to be visible in the Photos app? This article will explain how to do that.
The most important thing to understand about how the Photos app finds the pictures to display is that it does NOT look for the image files stored on the hard drive directly. Instead, it uses information from the Windows search index ![]() : if it finds information about an image file in the search index, it uses it to display the image. So in order to prevent an image from appearing in the Photos app, we need to find a way to remove information about that image file from the search index.
: if it finds information about an image file in the search index, it uses it to display the image. So in order to prevent an image from appearing in the Photos app, we need to find a way to remove information about that image file from the search index.
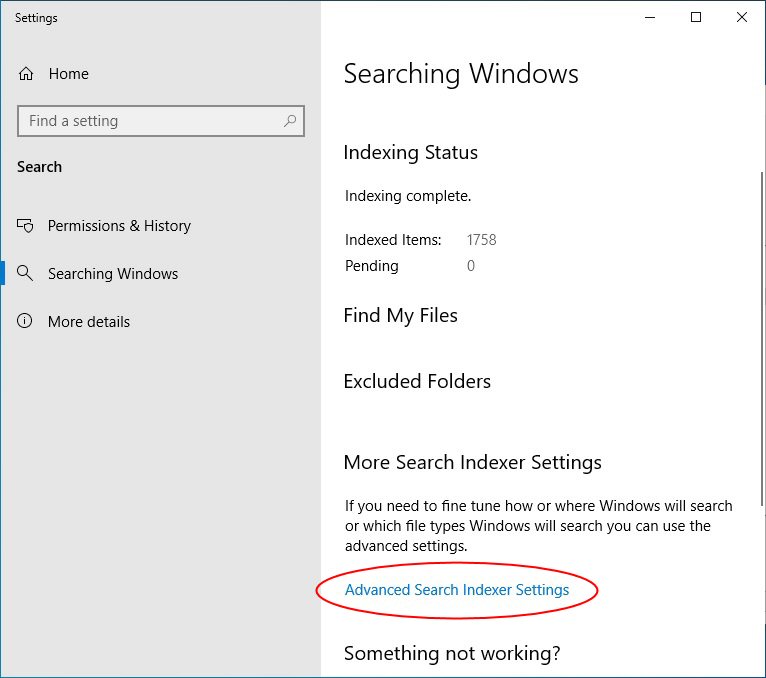
Windows 11/10 offers just a tool for that: from the Start menu, open Settings, and search for 'Windows Search Settings'. You should get to the screen that lets you control the folders that Windows search includes or excludes in its index. The amount of control that you have depends on the type of your user account: some features are only available to the administrators, and not to the standard users. Regardless, you should be able to open the Advanced Search Indexer Settings (or Advanced Indexing Options):
Another thing to understand about Windows search index that you cannot exclude individual files from it, you can only exclude folders. If you tell Windows to exclude a certain folder from indexing, then all files in that folder will be excluded. So, unless you have already done so, you should first create a folder for the image files that you want to be hidden from the Photos app, move the images files you want to be hidden in that folder, and then tell Windows to exclude that specific folder from its index.
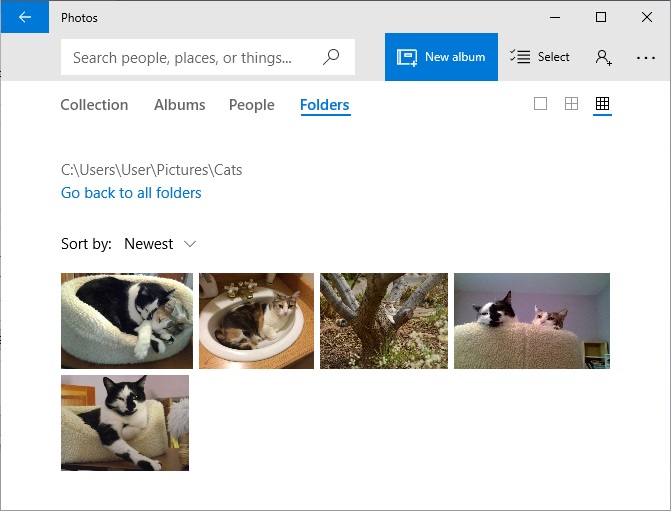
For example, suppose, for whatever reason, you don't want the pictures of your cats to appear in Photos app. Open File Explorer, navigate to the Pictures folder, and create a new folder there with the appropriate name (Cats in our example). Move the image files of the cats into that folder (drag-and-drop should work just fine for that). Use the Folders link of the Photos app to navigate to the Cats folder to check that the images you want to hide are actually there:
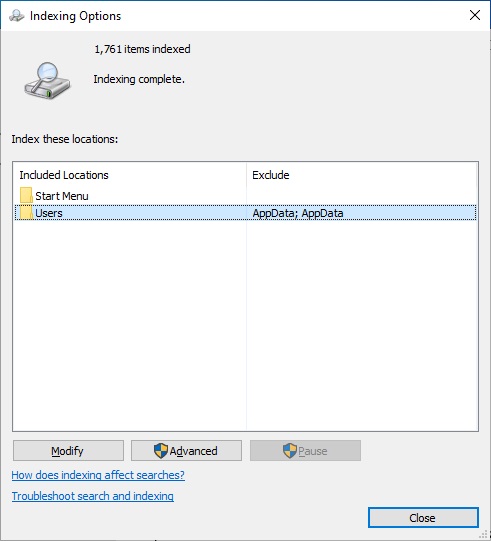
We need to hide folder with cat photos from the search index. Return to the Indexing Option screen we've discussed above and press the Modify button. When the Indexed Locations screen opens (see below), navigate to the folder you want to exclude (do not use the check boxes for that, use the little arrows to expand and collapse folders as needed.) For a folder in your Pictures folder, expand Local drive C:, then Users, then locate your user name and expand that folder, and finally expand Pictures. The folder we want to exclude from the index (named Cats in our example) should appear there. Now clear the check box next to the Cats folder, and that will tell Windows to exclude it from the search index (only the folders that have the check marks next to them are indexed.)

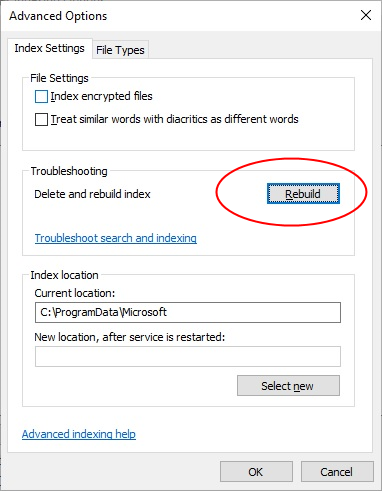
Press OK to close the screens you've opened and ... wait. Yet another thing to know about Windows search index is that it's picky about getting itself updated. Oftentimes, when Windows detects that you are actively using your computer, it delays the updates to its search index until your activity stops or slows down. Other times it may update the index almost immediately after you make changes to it. If you are an administrator of the computer, you can try to force Windows to rebuild the search index: on the Indexing Options screen, press Advanced, and then use the Rebuild button:
However, even forcing to rebuild the index sometimes does not make it happen soon enough. If you've waited a few minutes and nothing seems to change in the Photos app, try restarting the computer and check the Photos after that. Eventually, Windows index should catch up with the changes you've made, and the Photos app should stop displaying the images from the excluded folder. If it does not, consider moving the Cats folder out of the Pictures area altogether. For example, create a Cats folder in the root of the C: drive, and move the pictures there. This should force Photos app to refresh and remove the images from the view.
![]() Password-protect and hide personal files and folders with Folder Guard for Windows 11,10,8,7.
Password-protect and hide personal files and folders with Folder Guard for Windows 11,10,8,7.
User rating: ![]() 4.7 / 5
4.7 / 5
Purchase
or
download a free trial.
Read more...
That's nice, you might say, but what about other apps and File Explorer itself? Even if the images are not visible in the Photos app, anyone could still navigate to the Cats folder with File Explorer and see the images there. If you want to prevent that, excluding the folder from the search index is not enough, you need to protect access to the folder in some other way. Of course, we would be fools not to take this opportunity and suggest that our software Folder Guard was designed for just such a task! You could use it to make a secret folder with the photos of your cats, or password protect folder with images, and any time someone would want to look into it with File Explorer, they would need to enter that password first. Check it out!
Folder Guard User's Guide • Videos • Download • Purchase
If you want to link to this article, you can use this HTML code: <a href="https://www.winability.com/how-to-hide-pictures-from-the-photos-app-in-windows-10/">How to hide pictures from the Photos app in Windows 11 and 10</a>
More information
- Encryptability vs Folder Guard: which one to choose?
- What people are saying about Folder Guard...
- How to enable or disable test signing mode in Windows
- Folder Guard videos
- A FREE 30-day license is included
- What's new in the new version
- Folder Guard licenses explained
- End User License Agreement (ELUA)
- Emergency Recovery Utility
- How to lock folders and drives with passwords
- How to hide folders and files
- How to unhide a folder hidden with Folder Guard
- How to create a secret folder in Windows 11 and 10
- How to restrict access to Windows Settings
- How to restrict access to Control Panel
- How to set up Folder Guard to stop downloading from the Internet
- Locking access to the external drives with Folder Guard
- How to make Folder Guard recognize network drives
- Preventing installations of specific programs with Folder Guard
- How to restrict access to Task Manager with Folder Guard
- How to restrict access to Microsoft Store app with Folder Guard.
- How to password-protect a USB flash drive
- Always have a backup of your important files
Folder Guard 24.11

User rating:
![]() 4.7 / 5
4.7 / 5
Buy Folder Guard
from $29.95
Download free trial
More information:
Folder Guard Home Folder Guard Videos Purchase Folder Guard Download Folder Guard Documentation Support
 Stand with Ukraine
Our software:
Folder Guard Encryptability USBCrypt AB Commander MySecretFolder ActiveExit StartFinity IconShepherd SpaceInvestigator SoftDetective TweakUAC
Is WinAbility.com safe?