How to create a private folder in Windows 11 and 10
So, you let your kids play games on the PC, but you don't want them to mess up your bank statements or tax returns? Or, maybe you are writing a memoir and don't want someone else to take a peek into it before it's ready? Wouldn't it be handy to create a secret folder on your computer to keep your private files and documents?
Download and install Folder Guard
Our software Folder Guard is a tool that we've specifically designed to make it easy to create a private folder and stop other users from getting into that folder. Before you can use this software, you need to download and install it, if you have not done so yet. The download is free and it includes a 30-day license of full use, no credit card required. If you don't find it useful, use Windows settings to uninstall it from the computer, just like any other software (no hard feelings!).
Launch Folder Guard
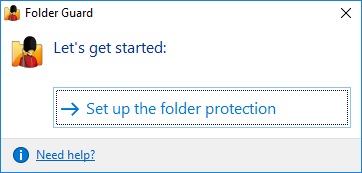
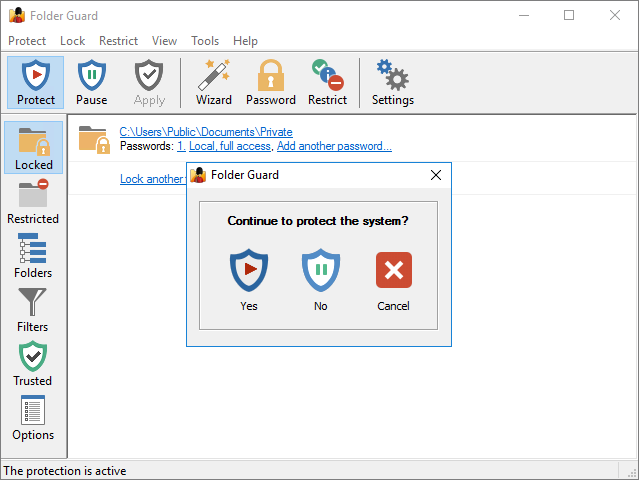
After you have installed Folder Guard, use its icon on the desktop to run it. The first time time you start Folder Guard, it prompts you to set up the folder protection:
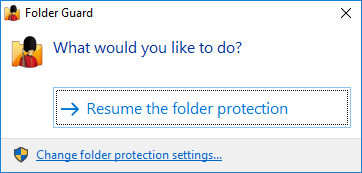
If you've used Folder Guard before, you should see a bit different screen with the link to change folder protection settings at the bottom:

Decide how you want to protect the private folder
Do you want to set up a private folder so that when someone opens it, they would need to enter a password to see what's inside of the folder? If so, Folder Guard can password protect folder of your choice. This method of protection is convenient, because all you need to do to start working with the private files is press the Unlock button and enter the correct password. However, what if someone else comes across this folder while browsing the computer and see the Unlock button? Maybe you don't want them to know you have a private folder at all?
If you don't want them even to see the private folder, can use another method of folder protection offered by Folder Guard: you can hide folder by restricting its visibility!
Choose the folder that you want to be private
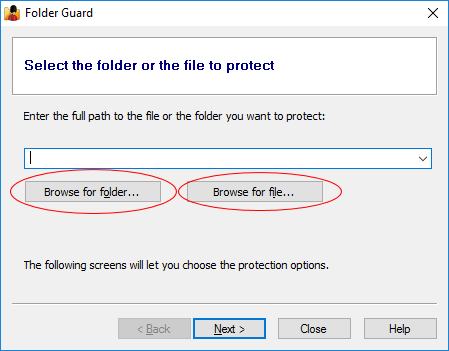
If you are only trying Folder Guard out, you may want to create a test folder on the desktop or under the Documents folder, or somewhere else on your computer. Press the Browse for folder button and select the folder that you want to become hidden:
Make the private folder hidden
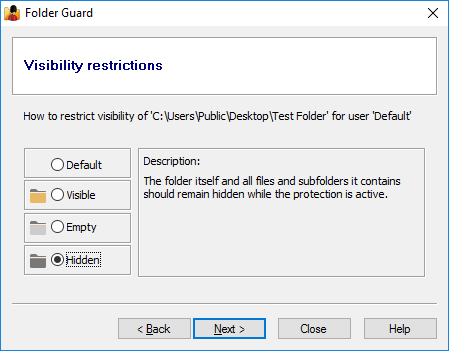
You want the folder you've chosen to be hidden, so select the appropriate visibility option on the next screen:
Restrict access to the private folder
Press Next, and another screen should appear giving you options for restricting access to the private folder. Select the No access option, to make sure that if someone were to guess the name of our private folder and attempt to open files in it without actually seeing the folder, such attempts would be prevented by Folder Guard:

Enable the protection of folders
After you've set up the restrictions for the private folder, the last step is you need to tell Folder Guard to start protecting the computer using the settings you've just created. To do that, press the Protect button on the toolbar, or press Apply if the protection is already on. You can also exit Folder Guard application and reply Yes when it prompts you to continue to protect the system:
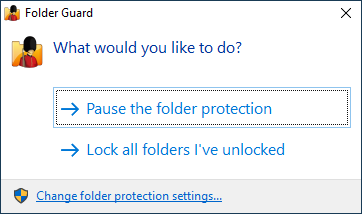
From now on, if you or someone else attempts to use Windows File Explorer to browse your computer, you should not see the private folder among other files and folders. However, what if you want to open the private folder and add a file to it or work with the private files already there? Run Folder Guard using the desktop icon or Start menu, and choose Pause the folder protection:
Enter the Folder Guard password that you've set up when you've installed Folder Guard, and the protection will pause: your private folder should become visible and accessible again. You can open the files from the private folder, edit them, save the files back, as usual. When done making changes to your private files, run Folder Guard again and choose to resume the protection:
The private folder should become hidden again.
![]() Password-protect and hide personal files and folders with Folder Guard for Windows 11,10,8,7.
Password-protect and hide personal files and folders with Folder Guard for Windows 11,10,8,7.
User rating: ![]() 4.7 / 5
4.7 / 5
Purchase
or
download a free trial.
Read more...
As you can see, Folder Guard is making it easy to create and maintain a private Windows folder. If you have not tried it yet, please feel free to download Folder Guard free of charge. It comes with a free 30-day license of full use, no credit card required to try it.
Happy computing! And good luck with the memoir.
Folder Guard User's Guide • Videos • Download • Purchase
If you want to link to this article, you can use this HTML code: <a href="https://www.winability.com/how-to-create-a-private-folder-in-windows-11-and-10/">How to create a private folder in Windows 11 and 10</a>
More information
- Encryptability vs Folder Guard: which one to choose?
- What people are saying about Folder Guard...
- How to enable or disable test signing mode in Windows
- Folder Guard videos
- A FREE 30-day license is included
- What's new in the new version
- Folder Guard licenses explained
- End User License Agreement (ELUA)
- Emergency Recovery Utility
- How to lock folders and drives with passwords
- How to hide folders and files
- How to unhide a folder hidden with Folder Guard
- How to create a secret folder in Windows 11 and 10
- How to restrict access to Windows Settings
- How to restrict access to Control Panel
- How to set up Folder Guard to stop downloading from the Internet
- Locking access to the external drives with Folder Guard
- How to make Folder Guard recognize network drives
- Preventing installations of specific programs with Folder Guard
- How to restrict access to Task Manager with Folder Guard
- How to restrict access to Microsoft Store app with Folder Guard.
- How to password-protect a USB flash drive
- Always have a backup of your important files
Folder Guard 26.3

User rating:
![]() 4.7 / 5
4.7 / 5
Buy Folder Guard
from $29.95
Download free trial
More information:
Folder Guard Home Folder Guard Videos Purchase Folder Guard Download Folder Guard Documentation Support
 Stand with Ukraine
Our software:
Folder Guard Encryptability USBCrypt AB Commander MySecretFolder ActiveExit StartFinity IconShepherd SpaceInvestigator SoftDetective TweakUAC
Is WinAbility.com safe?