How to move Pictures and other folders to Virtual Encrypted Disk.
If you are like most people, you have files on your computer that you don't want to be seen by other people. Tax returns, bank statements, personal letters, photos, or videos (you are not one of those who share everything on Facebook or Instagram, are you?) What if you forget your laptop someplace or have it stolen? Even if you use the full-disk encryption such as Bitlocker ![]() , it will not always protect your files: what if you need to let a repair person login to your PC to troubleshoot a problem it has? Or, a friend is visiting and did not bring their laptop with them, and suddenly they need to borrow yours to do something online... It's better to be prepared for such situations than leave your files vulnerable and stress over them when the situation occurs.
, it will not always protect your files: what if you need to let a repair person login to your PC to troubleshoot a problem it has? Or, a friend is visiting and did not bring their laptop with them, and suddenly they need to borrow yours to do something online... It's better to be prepared for such situations than leave your files vulnerable and stress over them when the situation occurs.
The way to keep your files secure is, of course, to use encryption software: you would use it to reserve a part of your storage for use as an encrypted area, that would appear in your computer as a separate Virtual Encrypted Disk, with its own drive letter. You would move any sensitive files from the regular storage to the Virtual Encrypted Disk, and that would keep them safe from the eyes of others, because the Virtual Encrypted Disk appears in the This PC folder only after you enter the correct encryption password to start it. You don't need to share this password with your friends or repair technicians!
One possible complication in this process could occur when trying to move the special folders that Windows designates for keeping common files: Pictures, Videos, Documents, Downloads, and others. The problem is, Windows gives a special treatment to such folders, and makes many programs to use them as default locations for saving files, etc. Even if you move the photos and videos out of their folders to the encrypted storage, Windows and its apps would still insist on using the original folders for new files, and changing the location to the Virtual Encrypted Disk every time it happens can become inconvenient and annoying pretty fast. To make Windows happy and stop bothering us, we need to let it know the new locations of the special folders, on the Virtual Encrypted Disk, as we show below.
Before actually starting to create a Virtual Encrypted Disk and move files and folders to it, we need to step back and do a little planning first. What size the Virtual Encrypted Disk should be? The answer depends on several factors. How large is the main storage device of your computer? Is it the only storage device available or do you have additional drives you could use for hosting the Virtual Encrypted Disk? How much free space does it have? How much space do your photos, videos, and other documents occupy now? Collect these numbers and plan for the future. If the only physical drive of your computer is the drive C:, you need to leave at least 20 GB of free space on it to be used by Windows for updates, restore points, etc.
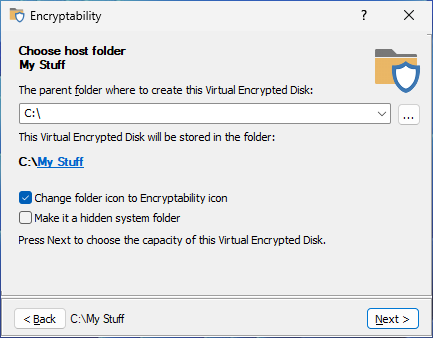
Another thing to consider, what name should you give to the Virtual Encrypted Disk? This name will not be encrypted and anyone who you let into your files could see it. You don't want the repair technician think it's just some junk file that could be deleted to free up the space! (One more reason to make sure you always have a good backup of your important files.) So, you could name it My Files, or My stuff, or maybe even IMPORTANT DO NOT DELETE.
One final point to think about is: which drive letter to use for the Virtual Encrypted Disk? A good letter would be the one closer to the end of the alphabet, because the first letters are better left for use by Windows, to assign to the removable USB drives you might connect to the PC in the future. The drive letter of the Virtual Encrypted Disk should remain static, because it will be used by Windows for the location of the special folders. Should you need to change the drive letter, you would also need to update the location of each special folder, which is possible, but why? Better reserve a specific drive letter and avoid the hassle of changing it in the future. In the examples below, we've selected for this purpose the letter R:
Now with the planning completed, let's get to actually implementing it.
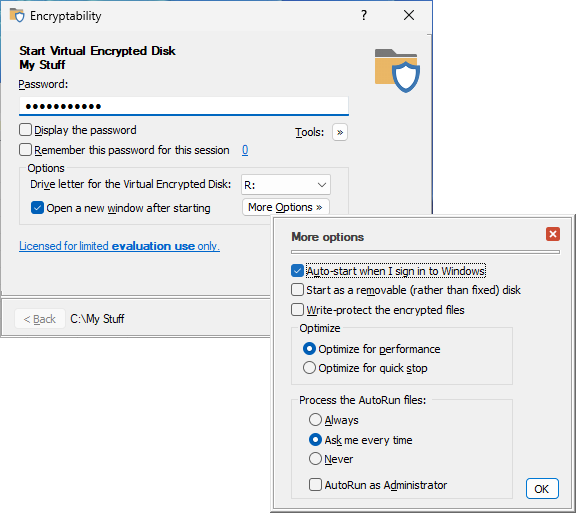
- Start the Virtual Encrypted Disk with the drive letter we've decided on reserving for it (R: in our example). Also, use the More Options screen to select the option to Auto-start when I sign in to Windows
Verify that the Virtual Encrypted Disk now appears as the drive R: in the This PC folder.
- Let's start moving the special folders to the encrypted drive. We begin with the folder Pictures: run File Explorer, right-click on Pictures, choose Properties from the menu and select the Location tab:
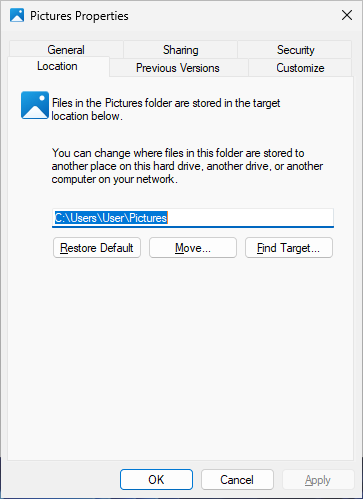
It should show the path to the physical storage of the Pictures folder, usually it is C:\Users[Your Windows user name]\Pictures
- To move the Pictures folder to the Virtual Encrypted Disk, press the Move button and select the Pictures folder on the R: drive (Use the New folder button of the browser window to create it, if it does not exist yet.)
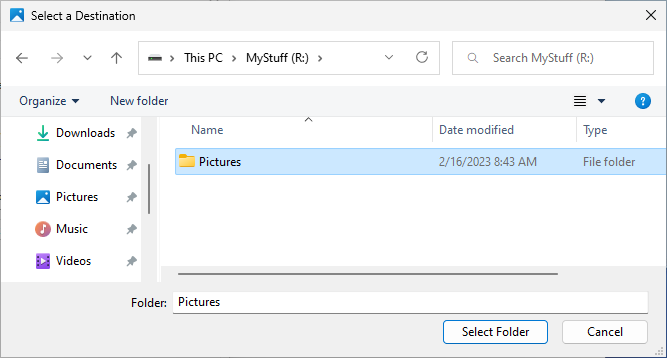
Or, you can type the new path R:\Pictures directly into the Location screen and Windows will prompt you to create the folder, if it does not exist.
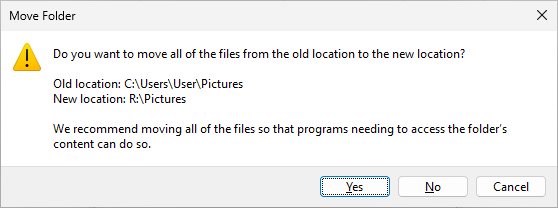
- Now, with the new location specified, press OK. Windows will probably ask you to confirm the operation, reply Yes:
If you have a lot of pictures, it may take a while to move them, and when it's done, you can now select the Pictures folder in File Explorer, and you should see all your pictures there, as before, with the only difference that now they are physically located on the Virtual Encrypted Disk.
Last thing to check is what happens after you restart Windows: the prompt to enter the encryption password should appear automatically after you log in to Windows. (If it does not, make sure you have selected the option Auto-start when I sign in to Windows as mentioned above.) Before you enter the password, if you or someone else attempts to navigate to the Pictures folder, they would see a message like the following:
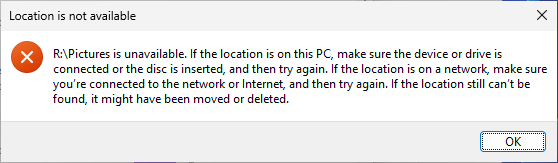
That's what the repair person or a friend of yours would see if you let them log in to your computer. Yourself, you would enter the password to start the Virtual Encrypted Disk, and the Pictures and other folders that you moved there would become instantly available.
Happy computing!
Encryptability User's Guide • Download • Purchase
If you want to link to this article, you can use this HTML code: <a href="https://www.winability.com/how-to-move-pictures-virtual-encrypted-disk/">How to move Pictures and other folders to Virtual Encrypted Disk.</a>
More information
- Encryptability vs Folder Guard: which one to choose?
- Personal vs Business license
- Limitations during the evaluation period
- What's new in the new version
- End User License Agreement (EULA)
- WinAbility Encryption Driver
- How to enable or disable test signing mode in Windows
- How to move Pictures and other folders to Virtual Encrypted Disk
- How to disable Fast Startup if you use encryption
- How to encrypt Firefox passwords, bookmarks, and cookies
- Why can't I copy large files over 4GB to my USB flash drive?
- How to password-protect a USB flash drive
- Always have a backup of your important files
Encryptability 26.5

User rating:
![]() 4.5 / 5
4.5 / 5
Buy Encryptability
from $49.95
Download free trial
More information:
Encryptability Home Purchase Encryptability Download Encryptability Documentation Encryption Driver Support
 Stand with Ukraine
Our software:
Folder Guard Encryptability USBCrypt AB Commander MySecretFolder ActiveExit StartFinity IconShepherd SpaceInvestigator SoftDetective TweakUAC
Is WinAbility.com safe?