Resetting the password with a "spare key" file |
|
Resetting the password with a "spare key" file |
|
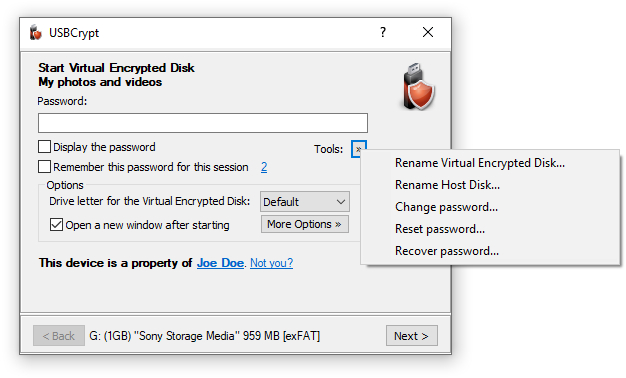
If you forget the password for a Virtual Encrypted Disk, you may have the option to reset the password. You can access this command by clicking on the Tools command on the password-prompt screen:
If you choose the Reset password command, USBCrypt will try to locate the "spare key" file for this specific Virtual Encrypted Disk, in the folder that is specified in the Options for USBCrypt window. If USBCrypt is able to find the "spare key" file, it prompts you to enter a new password:
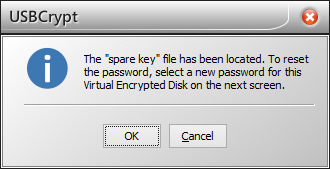
If you press OK and enter a new password on the next screen, USBCrypt will replace whatever the old password of the Virtual Encrypted Disk had before with the new password that you have just set up. After that, you should be able to open the Virtual Encrypted Disk as usual, by entering the new password.
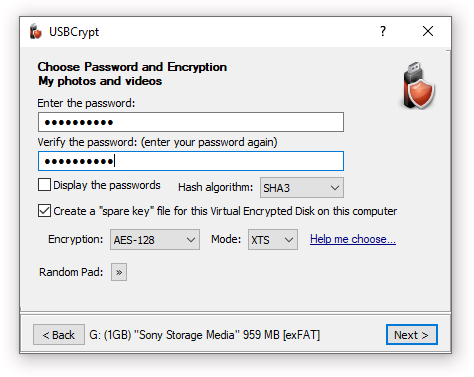
Of course, in order to be able to use the "spare key" file, it must have been previously created by you, for example, by selecting the Create a "spare key" file option when creating the Virtual Encrypted Disk:
The option to create a "spare key" file can be very handy when you no longer remember your real password. However, keep in mind that just as you can use it, anyone else who can get into your computer can use it, too! If your adversaries are smart (and you should always assume that, even if in reality it's not so), all they need to do is have physical access to your computer to be able to reset the password and start your encrypted drive whether you agree to that or not. Don't assume that if your computer prompts to enter the login password, you are protected from your adversaries, no! There are methods of getting to the files stored on your computer without knowing the login password, and if your adversaries want to get to your files badly enough, they will discover such methods, make no mistake about that.
As you can see, the "spare key" option has both the positive and negative consequences, and you should weight the benefits against the risks carefully when deciding whether to use that option or not. Let's summarize:
Benefit: The "spare key" option lets you gain access to your Virtual Encrypted Disk in the event that you forget the real password.
Risk: Anyone who has physical access to your computer can use the "spare key" option to access your Virtual Encrypted Disk without your permission.
Should you NOT use the "spare key" option when encrypting the drives? Such a decision has the benefits and risks, too:
Benefit: Without the "spare key" option no one can peek inside of your Virtual Encrypted Disk. Everyone must provide the real password that you've set up to start the Virtual Encrypted Disk, no exceptions.
Risk: If you forget the password, you won't be able to start the Virtual Encrypted Disk (unless you've selected a very week password that could be recovered in a reasonable time).
So, what should you decide, to use the "spare key" option or not to use it? It's ultimately your decision. Here is some more information about this option to help you decide:
The "spare key" file can be used to reset the password only for that specific Virtual Encrypted Disk for which it was created. You cannot use a "spare key" file to reset passwords of other Virtual Encrypted Disks, even if they have the same real passwords. Even if you delete a Virtual Encrypted Disk and then create exactly the same one again, with the same password and the same size, etc., the original "spare key" file cannot be used to reset the password of the newly created Virtual Encrypted Disk. In other words, the "spare key" option must be enabled or cleared for each Virtual Encrypted Disk individually, and it has no effect on other Virtual Encrypted Disks you might have.
The "spare key" files are stored on your local hard disk, under the Application Data folder (unless you have selected a different folder for that). They are not stored on the removable drives where the Virtual Encrypted Disks are located, or in any other place. It means that if your primary hard disk fails or becomes unusable for some other reason, all "spare key" file would go with it, too. Even if you replace your hard drive with another one of the same size and model, that would not replace the "spare key" files that were on the original hard drive. UNLESS you have specifically taken the steps to backup your original hard drive and then restore it to the new drive.
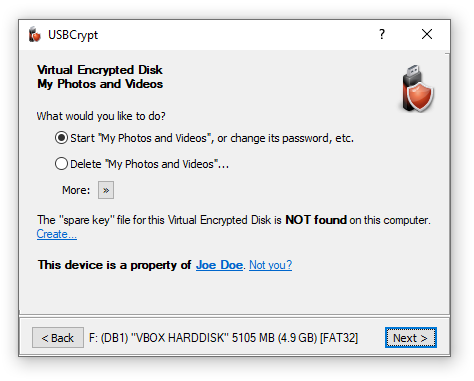
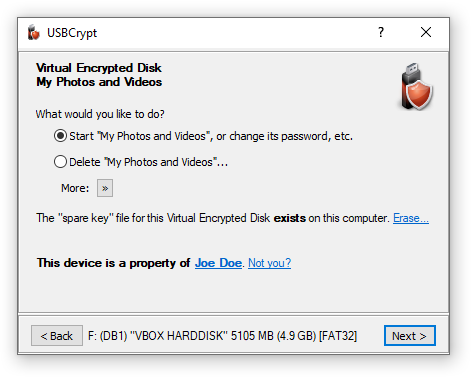
If you have not chosen the option to create a "spare key" file when creating the Virtual Encrypted Disk, and later changed your mind, you can force USBCrypt to create the "spare key" file later on, by running USBCrypt off the Start menu, selecting the host USB drive in the main list, and then clicking on the Create link in the bottom portion of the screen:
Conversely, if you have chosen to create a "spare key" file when encrypting the drive and later decided you better not have the "spare key" file on your hard drive after all, you can erase it by following the same steps, only this time click on the Erase link instead:
You will be prompted to enter the current password for the Virtual Encrypted Disk, to make sure you don't accidentally erase a "spare key" file for the drive you no longer remember the password of. If you've entered the correct password, USBCrypt will erase the "spare key" file.
IMPORTANT: The "spare key" file is erased with a multi-pass secure erase algorithm that leaves no chance of recovery of this file. Make sure you understand the risks of not having a "spare key" file before you decide to erase it!