User-specific restrictions |
|
User-specific restrictions |
|
With Folder Guard, you can set up different restrictions for different users of your computer. For instance, you can make a folder visible when you log in to Windows, but also make it hidden when some other user logs in.
To control which restrictions should apply to which users, use the User List of Folder Guard: (If it is not visible when you open the main window of Folder Guard, choose the View - User bar command from the menu to make it visible.)
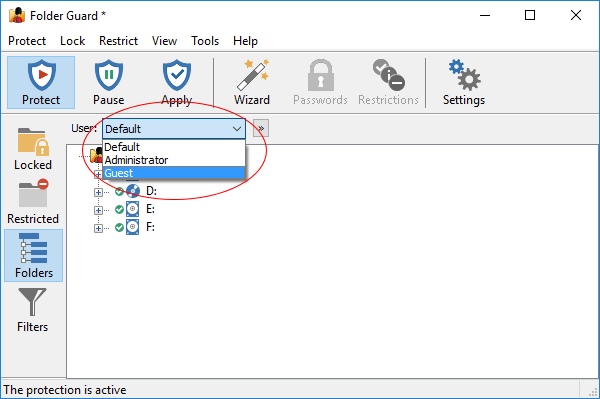
The User List originally contains only one item: Default. This user name is used to set up the restrictions that would apply to all users for whom no user-specific restrictions have been set up. To create restrictions that would apply to specific users, first you need to add the desired user names to the User List. To do that, press the button next to the User List and choose Modify user list from the menu:
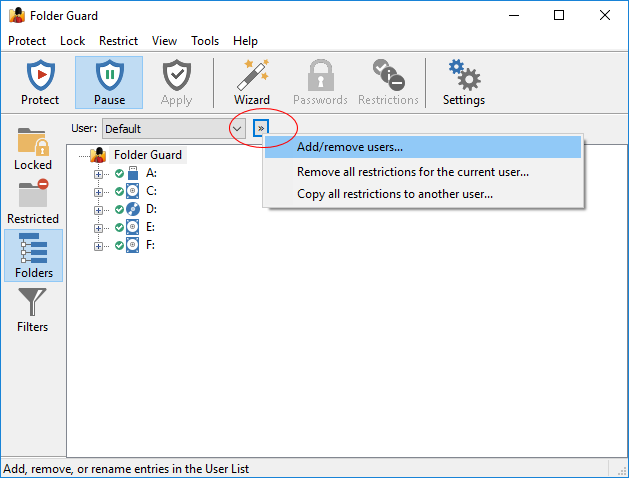
This should open the Modify User List window that you can use to add specific user names to the list. (You don't need to add all users, just those for whom you want to set up specific restrictions; other users not in the list would be restricted according to the Default user restrictions.)
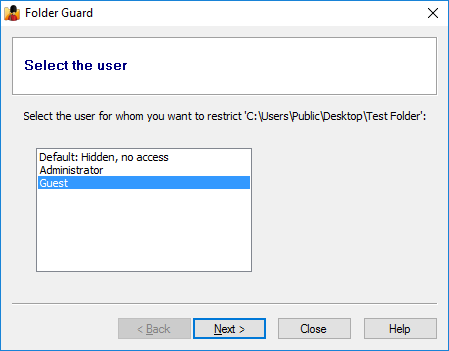
After you've added other user names to the User List, you will be prompted to select the user for whom you want to set up the restrictions when using the Wizard:
If you right-click on a folder in the Folders view of Folder Guard and use the context menu to set up the restrictions, the commands would apply to the user currently selected in the User List.
For example, suppose you have a folder named Private (located in the public Desktop folder), and you usually log in to Windows using the user name Administrator. You want to set up the protection of this folder so that when you log in to Windows the folder is visible, but when any other user logs in, the folder should be hidden. To do that, first select the Default name in the User List, then navigate to this folder in the folder tree of Folder Guard, and apply the Hidden attribute to this folder:
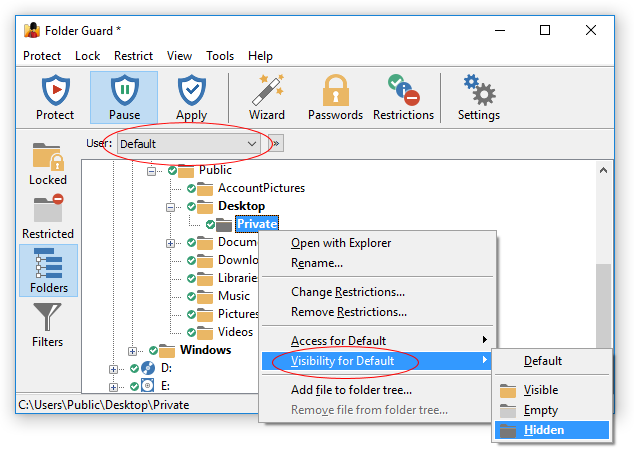
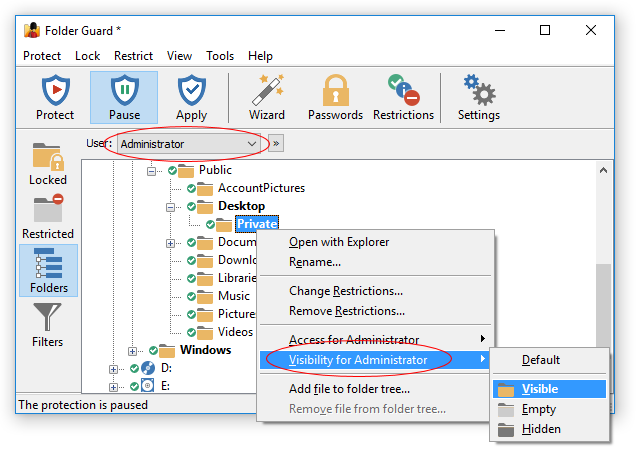
This will make the Hidden attribute to apply to this folder when any user logs in to Windows. The next step is to make the folder visible when you (Administrator) log in. For that, select Administrator in the User List, then right-click on the folder and choose the Visible attribute from the menu:
That's it; the user-specific protection of the folder has been set up! If you log in to Windows using the user name Administrator, the folder should be visible. If any other user logs in to Windows, the Default user's attributes would apply, and that would make the folder hidden.
Of course, if you have other users, you can set up restrictions specific to them, too. For instance, if you want some users to be able to see and open files from your private folder, but not to save any changes to them, you would assign the Read-only attribute to the folder for such users. If you don't assign any user-specific attributes to a folder, then when such a user logs in to the computer, the restrictions specified for the Default user would apply.
If you share a folder on a network, you can set up separate restrictions that would apply to the users who access the shared folder from other computers over the network. To do that, use the Add/remove users screen to add the special NetworkUser name to the user list. Then, select this user name in the User List and set up the restrictions for it in the same way as for the local users. Remember also that Windows offers its own, built-in method of controlling security of the shared folders, which you can use instead of Folder Guard.