Hiding and restricting access to folders |
|
Hiding and restricting access to folders |
|
In addition to protecting folders with passwords, Folder Guard also allows you to hide folders and/or restrict access to them without creating individual passwords for each such folder. You can choose to hide a folder completely, or make it appear empty. You can also make a folder completely inaccessible, preventing someone from opening it, or make it read-only, that would allow the user to open and view the files within the folder, but prevent saving modifications back to the protected folder. Both folders and files can be protected with restrictions.
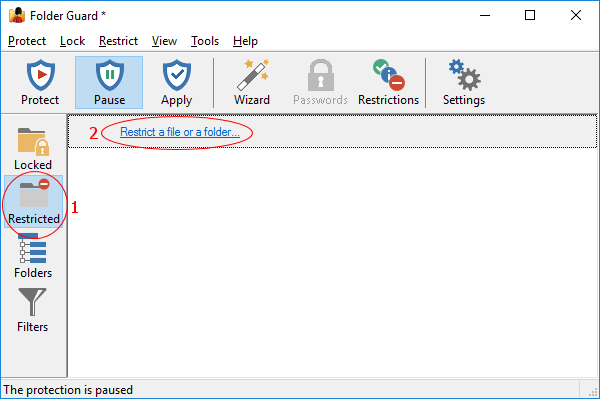
To set up such restrictions for a folder, switch to the Restricted view of Folder Guard and click the Restrict a file or a folder link:
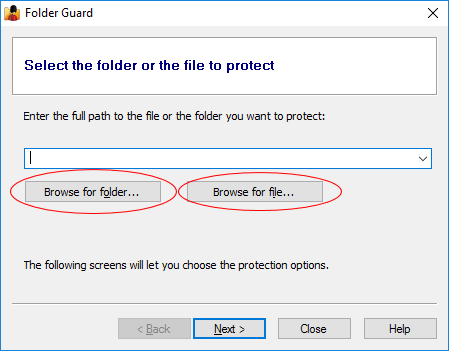
Press Next, and use the Browse for folder or Browse for file buttons to select a file or a folder that you want to restrict:
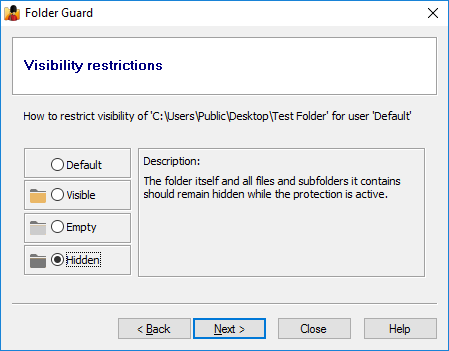
After selecting a folder or a file, press Next again, and you should be able to select the desired visibility attribute for it:
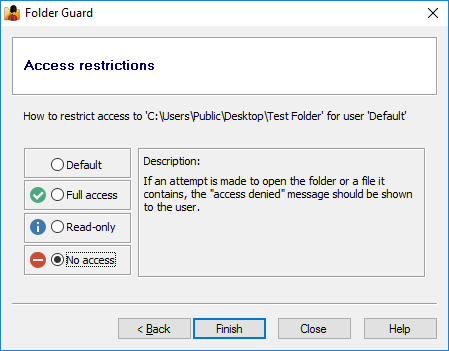
In addition to the hidden attribute, it's also a good idea to protect the folder with the no access attribute as well, to make other users unable to open files from that folder even if they cannot see them (such as through the previously created shortcuts, for example). To do that, press Next, and select the No access option:
To see the restrictions in action, resume the protection (or Apply the changes), and the folder you've made hidden should become invisible to Windows Explorer, Windows applications, MS-DOS programs, and the command prompt. All files and subfolders that might be located in that folder will be hidden, too, until you pause the protection.
If you did not select to hide the folder, but only selected the no access option, then the folder would be visible, but an attempt to open it would result in the Access denied or a similar message displayed by Windows. To allow access to such a folder, pause the protection. When done, resume the protection to make the folder inaccessible again.
If you have not applied any restricting attributes to a folder, such a folder is considered to have the default attributes. (That's what most folders have initially, before you start setting up the protection.) The visibility of (and access to) such a folder is determined by the attributes of its parent folder: if the parent folder is restricted, its files and subfolders become restricted, as well, unless you have assigned different attributes to the files or subfolders, which would override the attributes inherited from the parent folder.
Note that each folder can have different attributes for different users of your computer, so that the folder would be protected differently for each user.
If you don't want to use the Wizard as described above, you can also set up the restrictions using the Folders view of the Folder Guard application. In that view, navigate to the folder you want to restrict, and then use the commands on the right-click menu:
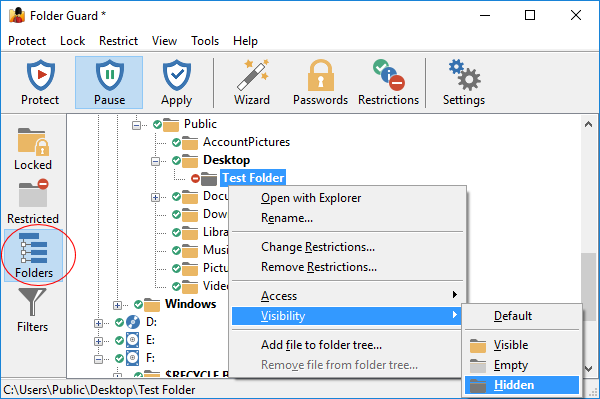
If you want to restrict a file this way, you need to use the Add file to folder tree command first, to make the file appear in the folder tree, and then use the right-click menu for the file, just as you would for the folder.
If you want to restrict a file or a folder on another computer on the same network, use the View - Add network location command first, to make the network location appear in the folder tree, then navigate to it and set up the restrictions just as you would for the local files and folders.
So you've hidden a folder from other users, or restricted it in some other way, but now you want to use that folder yourself, without restrictions. Unlike the password-protected folders, you cannot temporarily unrestrict the individual files or folders, but you can pause all protection instead. To do that, you don't need to run the main program of Folder Guard every time you want to pause or resume the protection. Some of the quicker ways of doing that are:
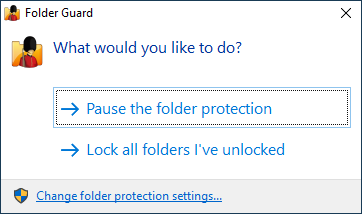
1. Run Folder Guard from Start menu or from Desktop, and it should prompt you to pause or resume the protection:
2. Right-click on the notification icon of Folder Guard and use the commands on its shortcut menu:
![]()
(If you don't see this icon, it means that you have either disabled the Show the notification icon option, or that your Windows taskbar is configured not to show all notification icons.)
3. If you have set up a hot key of Folder Guard, you could press it to quickly display the prompt to pause or resume the protection, too.
When the folder becomes visible, you can open the files it contains, and work with them as usual. When done, use the same commands described above to Resume the protection, and the folder will become hidden again, until next time you need to see it.
Of course, if you want to make the folder visible permanently, and not hide it with Folder Guard anymore, you can do so by removing restrictions from the folder using the main Folder Guard application.
Yes, you can use Folder Guard to hide or restrict access to such ghost folders (and/or files).