Encrypting USB drive: Choose name |
|
Encrypting USB drive: Choose name |
|
The first screen of the wizard prompts you to choose a descriptive name for the Virtual Encrypted Disk you are about to create:
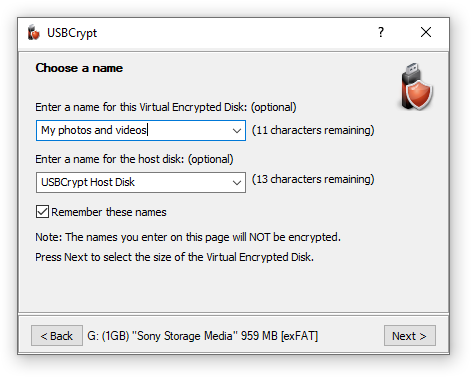
The name of the Virtual Encrypted Disk that you enter here will be displayed by USBCrypt on its windows and menus later on, when you will be working with the encrypted drive. If you plan to encrypt several USB drives, you may want to enter the descriptive text here to help you distinguish between these USB drives later on. For example, if you plan to use the drive mainly to store your vacation photos, you can name it Photos. Keep in mind that this name will NOT be encrypted: it will be shown on the USBCrypt screens even before the correct password is entered. You also have the option of not entering any name at all: if you leave the name box empty, USBCrypt will not be displaying any name on its screens later on.
You also have the option of entering a custom name for the host disk. The host disk name is displayed by Windows when you open the Computer (or My Computer) folder, as a label next to the host disk's icon.
Note that USBCrypt can remember the names that you enter here: if you select the option Remember these names, then next time you run USBCrypt you can see the previously entered names by clicking on the down arrows at the far right end of the Enter a name boxes. You can select one of the previous names in the list to use it without typing the name again. If you don't want the name to be remembered in this way, clear the Remember these names option before clicking on the Next button. You can also choose the Clear all command (the last item on the list of names) to erase the list and make USBCrypt "forget" them.
Next step: Choose size