Using ActiveExit to manage Group Policy Objects |
|
Using ActiveExit to manage Group Policy Objects |
|
To use the Group Policy to manage ActiveExit on a network, first download the Active Exit Administrator's Kit from the ActiveExit web site ![]() . Decompress the Zip file, and you should find the ActiveExit setup file inside. Run it to install ActiveExit on the server; you will use it to configure a Group Policy Object (GPO) that would control ActiveExit settings on the client computers. You should also find two ActiveExit MSI files there, which you can use to install and operate ActiveExit software on your network.
. Decompress the Zip file, and you should find the ActiveExit setup file inside. Run it to install ActiveExit on the server; you will use it to configure a Group Policy Object (GPO) that would control ActiveExit settings on the client computers. You should also find two ActiveExit MSI files there, which you can use to install and operate ActiveExit software on your network.
Note: The Zip file includes the ActiveExit.ADM file that contains the administrative templates for the settings of ActiveExit. This file is provided for reference only. While theoretically it's possible to use this file to manage the settings in the GPOs, we do not support such use. Instead, you should use the ActiveExit configuration utility to edit the GPOs, as described below.
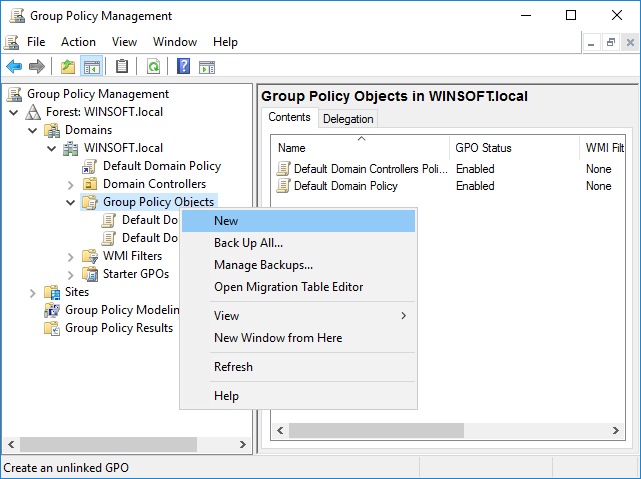
The first thing to do is create a new GPO that will hold the ActiveExit settings. Run the Group Policy Management tool on the server and select Group Policy Objects in the left pane. Right-click on it, and choose New from the menu:
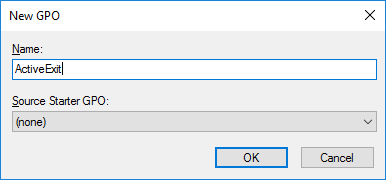
In the New GPO dialog, enter a name for the GPO (such as ActiveExit):
Now that the GPO has been created, we will use it to configure ActiveExit. The configuration involves several distinct tasks, described below.
ActiveExit uses the MSI files to install its software on the client computers. As such, configuring the GPO to install ActiveExit on the client computers is not different from any other software that is using the MSI files for its installation.
This task should be done just once, when ActiveExit is first installed on the network. You should also repeat it when upgrading ActiveExit to a new version.
Before configuring the GPO, first copy the MSI files to a shared folder that is accessible from the client computers. The usual C:/ServerFolders/Company folder should work just fine for that; verify that the client computers are able open this folder using the UNC path, such as \\SERVER\Company (replace SERVER with the actual server name, such as SRV16ESS that we use in the example below.)
You may want to create subfolder there named ActiveExit packages, and copy both the ActiveExit-NNN-x86.MSI and ActiveExit-NNN-x64.MSI files into it.
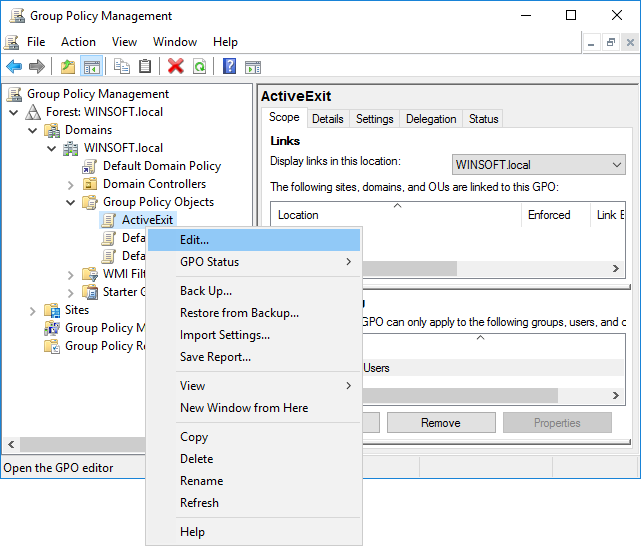
Now we can configure the GPO to install the MSI files of ActiveExit on the client computers. Using the Group Policy Management tool, right-click on the ActiveExit GPO and select Edit from the shortcut menu:
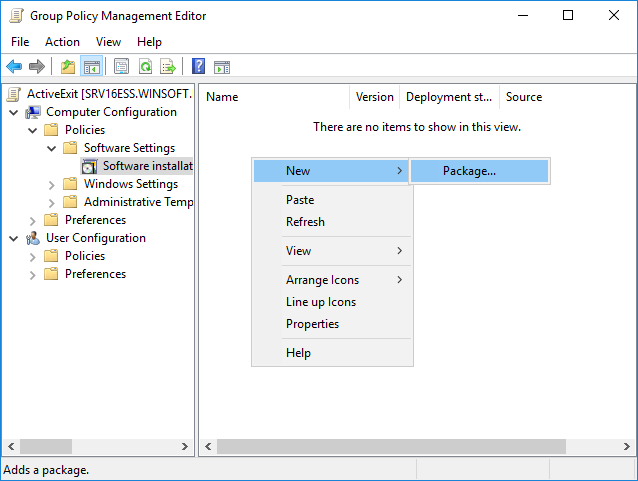
In the left pane, expand Computer Configuration, Policies, Software settings, and select Software installation. In the right pane, right-click on an empty space and choose New - Package from the shortcut menu:
Now navigate to the shared folder Company/ActiveExit packages, but do not start from the C: drive; instead, start from the Network folder, then open the server, and then proceed to the shared folder from there. This should ensure that the MSI files are specified using their UNC paths, as they appear to the client computers:
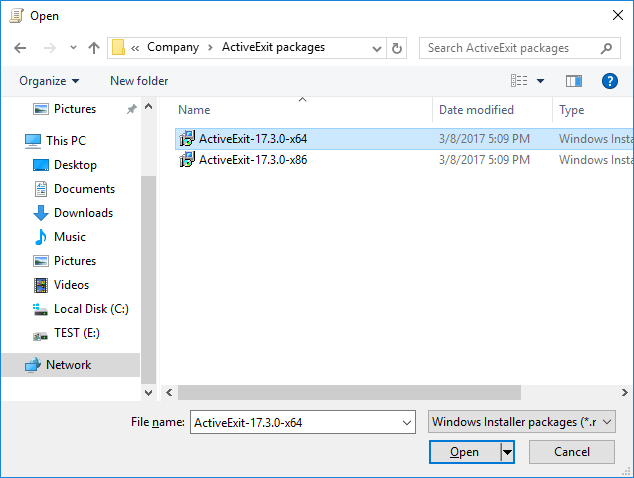
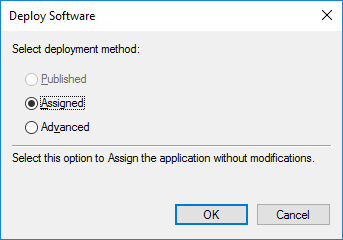
Select one of the MSI files (x86 or x64, depending on the bitness of Windows that the client computers have), and on the next screen select the Assigned option:
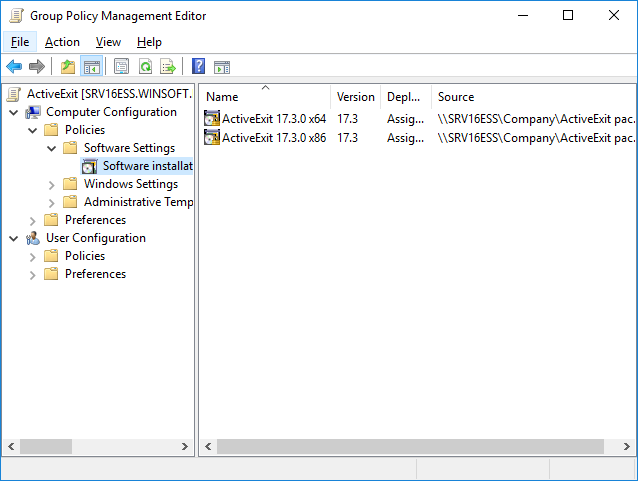
The selected file should now appear in the right panel of the Group Policy Editor. If your network has a mixture of 32-bit and 64-bit installations of Windows, repeat the same procedure to add the other MSI file. When done, make sure that the path(s) in the Source column start(s) with \\SERVER\... rather than C:
Close the Group Policy Editor. Note that at this point even though the GPO is configured to install ActiveExit on the client computers, no installation is taking place yet: you must link the GPO to the appropriate Organizational Unit(s) in order for the installations to actually take place (see below).
For this step, install ActiveExit software on the server, if you have not do so yet. You can use the appropriate MSI file, or the Setup file from the Zip file, the result should be the same.
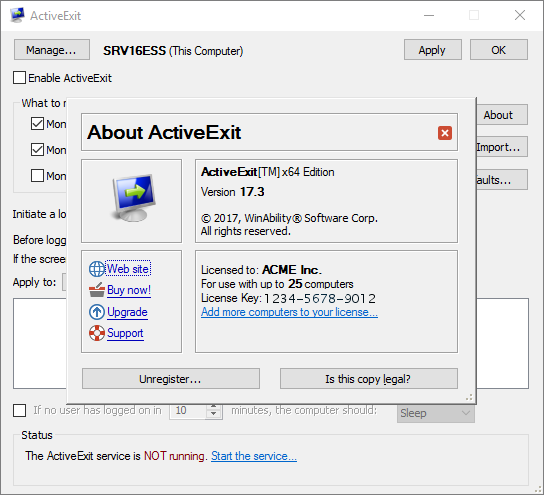
One more thing to check is that your copy of ActiveExit has the proper license information entered. To verify it, press the About button on the main ActiveExit screen; and examine the license information it is displaying:
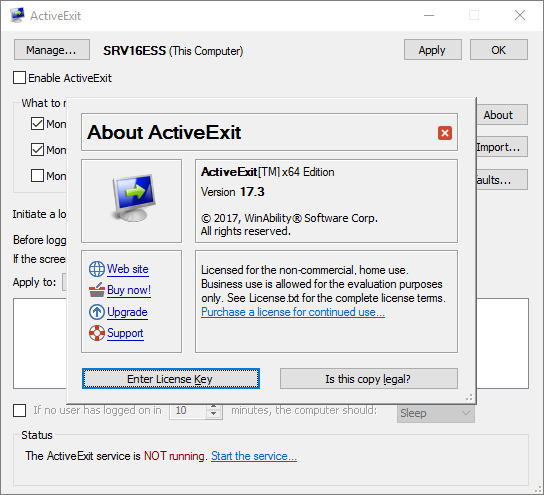
If it shows a text similar to the above, it means that the built-in license is used: it allows one to evaluate the software on up to 5 computers (including the server). For continued operation on more than 5 computers, a separate license must be purchased. After the purchase, press the Enter license key button and fill out the form. When your About screen shows your specific license, you are ready to continue:
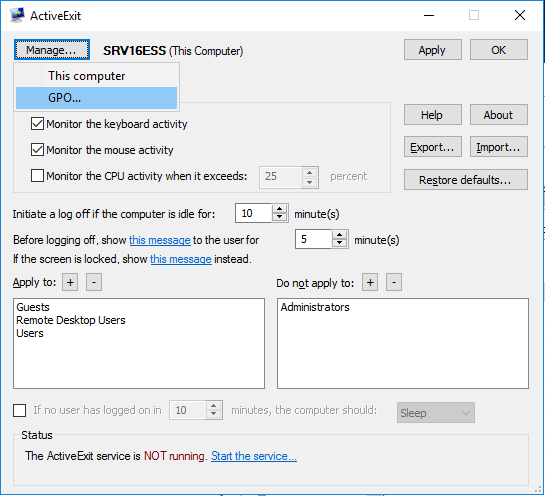
After making sure the license information is correct, close the About window, and press the Manage button. Then select GPO from the menu:
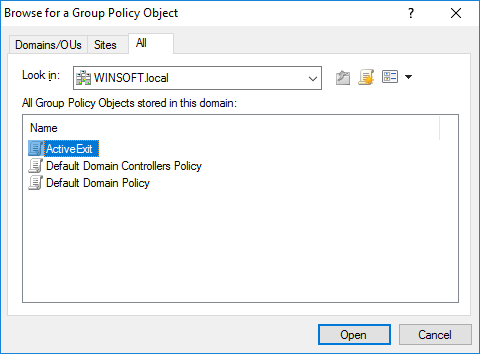
Select the ActiveExit GPO that you had previously created (see above):
Now use this screen to adjust the settings, in the same way as you would do it for a computer. The difference is that these settings would be saved to the GPO, and they would be used by the client computers which are linked to this GPO:
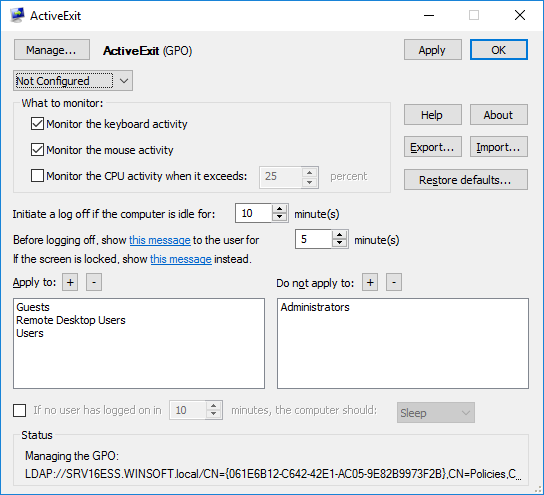
The important thing to change on this screen is replace Not Configured with Enabled. You may also want to adjust other settings, as needed. When done, press Apply or OK, and that would conclude the configuration of ActiveExit settings in the GPO.
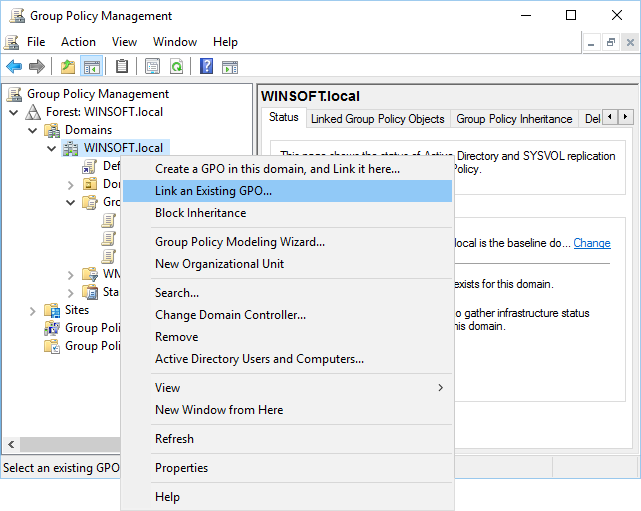
At this point the GPO is configured and ready to use. To specify which parts of your network should use the settings of this GPO, link it to the appropriate Organizational Units (OU), just like any other GPO. In our example, we have only one OU, and we will link this GPO to it, by right-clicking on it in Group Policy Management tool, and choosing Link an Existing GPO from the shortcut menu:
Select ActiveExit GPO from the list, and press OK. From this moment on, the computers in the OU will start to download the GPO from the server and apply the GPO settings. You are done!
Well, not quite. If you are new to the GPO world, you will probably notice that nothing seems to change on the client computers for some time. This is because the Group Policy updates are not performed immediately, it may take as long as 90 or 120 minutes for the changes to take effect on the network computers.
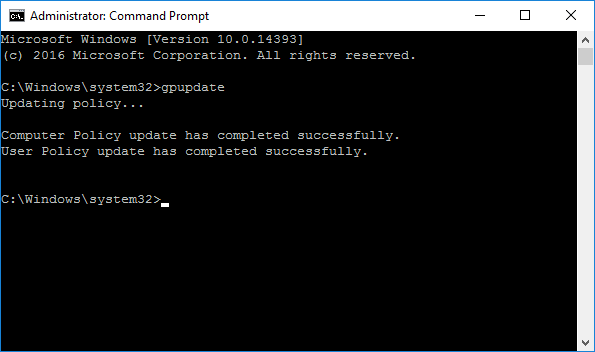
It's possible to force the update to the Group Policy, though. On the client computer where you want the Group Policy to be updated (not on the server!) open the command prompt as Administrator, and enter the gpudate command. It should force the client computer to obtain the current Group Policy from the server and apply it in real time, without waiting a couple of hours for the update to happen automatically:
Keep in mind, however, that changes to the ActiveExit settings become effective only when a user logs in to the computer. So, after you have changed the ActiveExit GPO on the server, and issued gpudate on the client, you still need to log off the client and log back on for the new settings to take effect.
In some situations it's not enough to log off and log back on, but a full computer restart is required. For example, if you have linked the ActiveExit GPO to a computer for the first time, and performed gpudate on the client, the client computer must be restarted in order for ActiveExit software to be actually installed on it. The restart is also needed after you post an updated version of ActiveExit software on the server: the software update can only happen after the client computer is restarted.
Please consult your Windows Server documentation for more information on GPOs and Group Policy.
If you run ActiveExit on a computer that is managed via a GPO, it lets you see the current options, but it does not let you change them:
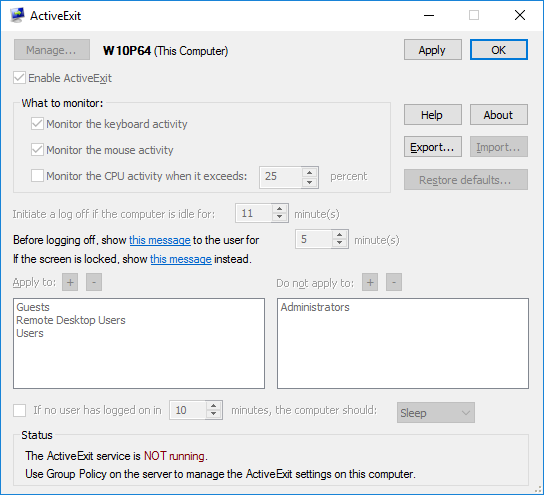
This situation occurs because the computer is managed from the server, by applying the changes to the GPO. To change the settings, make the changes to the GPO on the server, as described above, and then issue gpudate on the client. If instead you want to allow the users of the client computers to make changes to the ActiveExit settings directly, you must set the state of the GPO on the server to Not Configured rather than Enabled or Disabled. This will cause the GPO settings to be deleted from the client computers during the next Group Policy update, and that would allow the users to change the ActiveExit settings on each client computer directly.
Do NOT delete ActiveExit GPO or uninstall ActiveExit software as the first step! Before that, you need to undo the steps described above:
First, run ActiveExit software on the server, open the ActiveExit GPO with it, and set the status of the GPO to Not Configured. This will cause the ActiveExit settings to be removed from the client computers after the next Group Policy update.
Second, edit the ActiveExit GPO with Group Policy Editor on the server, and delete the ActiveExit packages from the GPO. This should uninstall ActiveExit software from the client computers after they update their Group Policy and restart.
Now wait for the Group Policy to be updated on the client computers, or use the gpudate command on them to force the updates. Restart the client computers after the update to force them to actually uninstall ActiveExit software.
After all client computers performed this procedure, use Group Policy Management tool on the server to unlink the ActiveExit GPO, and then delete the GPO itself. If necessary, use Windows Control Panel on the server to uninstall ActiveExit, and that should complete the removal procedure.